Nginx is a free and open source web server, it can also be used as reverse proxy, HTTP load balancer, HTTP Cache and mail proxy. Nginx is available for all the Unix like operating systems and released under BSD-like license.
In tutorial we will learn how to install latest version of Ngnix on Ubuntu 18.04 LTS and Debian 9 Server,
Nginx Installation on Ubuntu 18.04 LTS / Debian 9
Installation steps of Nginx on both OS Ubuntu 18.04 and Debian 9 is identical, run the beneath commands one after the another from the terminal,
pkumar@linuxtechi:~$ sudo apt update
pkumar@linuxtechi:~$ sudo apt install nginx -y
Start & enable Nginx service
Run the below commands to start and enable nginx service,
pkumar@linuxtechi:~$ sudo systemctl start nginx
pkumar@linuxtechi:~$ sudo systemctl enable nginx
Synchronizing state of nginx.service with SysV service script with /lib/systemd/systemd-sysv-install.
Executing: /lib/systemd/systemd-sysv-install enable nginx
pkumar@linuxtechi:~$
Use below commands to verify the ngnix service status,
pkumar@linuxtechi:~$ sudo systemctl status nginx
pkumar@linuxtechi:~$ sudo systemctl is-active nginx
Output of above commands would be something like below,

Allow Nginx Ports ( 80 & 443 ) in OS firewall
In case OS firewall is enabled and configured on your Ubuntu 18.04 and Debian 9 Server then execute the below ufw commands to allow 80 and 443 port,
pkumar@linuxtechi:~$ sudo ufw allow 80/tcp
Rules updated
Rules updated (v6)
pkumar@linuxtechi:~$ sudo ufw allow 443/tcp
Rules updated
Rules updated (v6)
pkumar@linuxtechi:~$
Now Verify rules using the below command,
pkumar@linuxtechi:~$ sudo ufw status numbered
Status: active
     To                         Action      From
     --                         ------      ----
[ 1] 80/tcp                     ALLOW IN    Anywhere
[ 2] 443/tcp                    ALLOW IN    Anywhere
[ 3] 22/tcp                     ALLOW IN    Anywhere
[ 4] 80/tcp (v6)                ALLOW IN    Anywhere (v6)
[ 5] 443/tcp (v6)               ALLOW IN    Anywhere (v6)
[ 6] 22/tcp (v6)                ALLOW IN    Anywhere (v6)
pkumar@linuxtechi:~$
Once you are done with above changes, let’s verify the Nginx Welcome Page!!!
Open your Web browser, type : http://{Your-Server-IP-Address}

Server Block / Virtual Host in Nginx
In Apache Web Server we have virtual hosts concept where we can define details of multiple web sites, similarly in Nginx we have Server blocks means block for each web site, let’s look into the default server block (/etc/nginx/sites-available/default) and then we will create our own site’s server block,
pkumar@linuxtechi:~$ sudo vi /etc/nginx/sites-available/default

Define Your Custom Server Block
Let’s assume I want to create a custom server block for web Server www.linuxtechi.lan,
Create a document root using below command,
pkumar@linuxtechi:~$ sudo mkdir /var/www/linuxtechi
Create a index.html under Web Server document root,
pkumar@linuxtechi:~$ sudo vi /var/www/linuxtechi/index.html
<!DOCTYPE html>
<html>
<head>
<title>Welcome to LinuxTechi</title>
</head>
<body>
<h1>Welcome to LinuxTechi</h1>
<p>LinuxTechi Test Page running on NGINX Web Server - Ubuntu 18.04</p>
</body>
</html>
Now create your server block by creating a file “linuxtechi.lan” with the following content under the folder /etc/nginx/sites-available
pkumar@linuxtechi:~$ sudo vi /etc/nginx/sites-available/linuxtechi.lan
server {
    listen 80;
    root /var/www/linuxtechi;
    index index.html;
    server_name www.linuxtechi.lan;
}
To activate the above created server block, create a symbolic link from “/etc/nginx/sites-available/linuxtechi.lan” to “/etc/nginx/sites-enabled”
pkumar@linuxtechi:~$ sudo ln -s /etc/nginx/sites-available/linuxtechi.lan /etc/nginx/sites-enabled
Now restart your nginx service using below command,
pkumar@linuxtechi:~$ sudo systemctl restart nginx
Note: In case you don’t have DNS server then you should add below entries in hosts file of your client machine,
192.168.0.107 www.linuxtechi.lan
Now access your web server via url : http://{Web-Server-Name}
In my case , url is http://www.linuxtechi.lan

Enable SSL Certificates for Your NGINX Server
As of now our nginx web server is running on non-secure port 80, to make the web server secure then we need to install ssl certificates. You can get the SSL certificates from the trusted sources or you can also use self-signed certificates generated via openssl command.
In this tutorial I am generating the certificates for my web server using openssl command,
pkumar@linuxtechi:~$ sudo openssl req -x509 -days 703 -sha256 -newkey rsa:2048 -nodes -keyout /etc/ssl/private/linuxtechi.key -out /etc/ssl/certs/linuxtechi-cert.pem
[sudo] password for pkumar:
Generating a 2048 bit RSA private key
........................................................................
writing new private key to '/etc/ssl/private/linuxtechi.key'
-----
You are about to be asked to enter information that will be incorporated
into your certificate request.
What you are about to enter is what is called a Distinguished Name or a DN.
There are quite a few fields but you can leave some blank
For some fields there will be a default value,
If you enter '.', the field will be left blank.
-----
Country Name (2 letter code) [AU]:IN
State or Province Name (full name) [Some-State]:Delhi
Locality Name (eg, city) []:Delhi
Organization Name (eg, company) [Internet Widgits Pty Ltd]:LinuxTechi
Organizational Unit Name (eg, section) []:IT
Common Name (e.g. server FQDN or YOUR name) []:www.linuxtechi.lan
Email Address []:info@linuxtechi.lan
pkumar@linuxtechi:~$
Above command has generated the private key with “linuxtechi.key” and certificates with name “linuxtechi-cert.pem“, these certificates will be applicable for the next two years.
Now update your server block, add the key and certificate location and change the web server port from 80 to 443,
pkumar@linuxtechi:~$ sudo vi /etc/nginx/sites-available/linuxtechi.lan
server {
    listen 443 ssl;
    root /var/www/linuxtechi;
    index index.html;
    server_name www.linuxtechi.lan;
    ssl_certificate /etc/ssl/certs/linuxtechi-cert.pem;
    ssl_certificate_key /etc/ssl/private/linuxtechi.key;
}
Restart the nginx service using following command,
pkumar@linuxtechi:~$ sudo systemctl restart nginx
pkumar@linuxtechi:~$
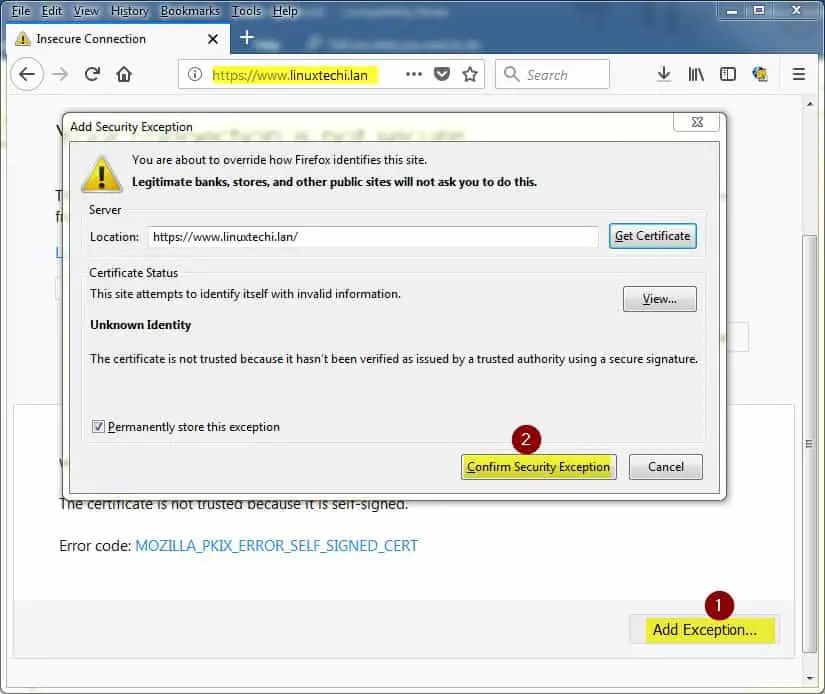
Access Your Web Server on https protocol like,
https://www.linuxtechi.lan
Note: As we have installed our self-signed certificates so we have to first time check / click on “Add Exception” and then “Confirm Security Exception” while accessing the web server on https.
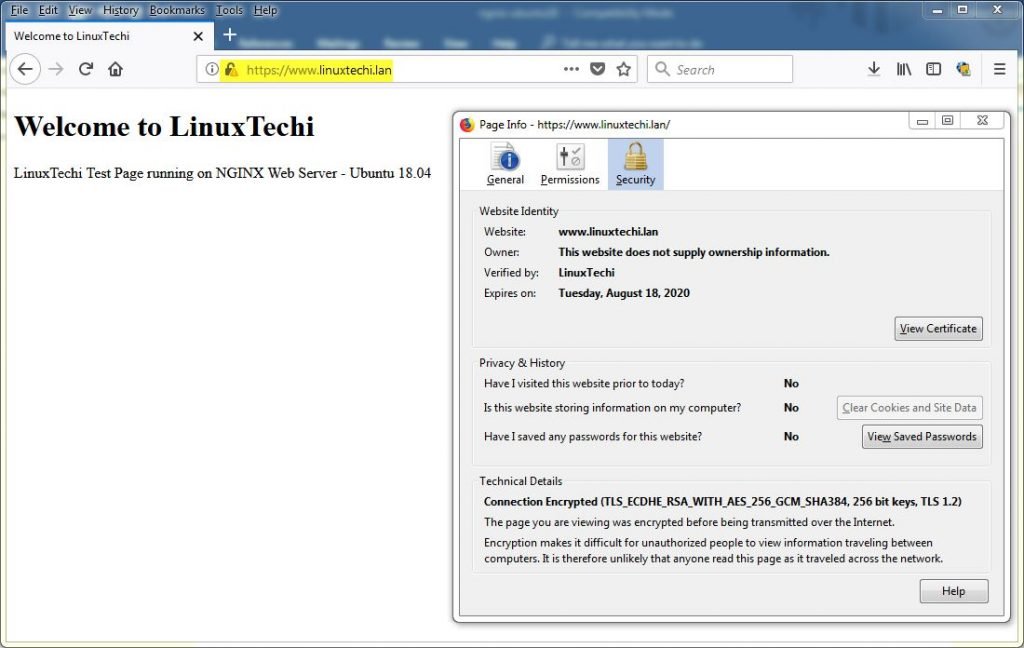
This confirms that we have successfully enabled self-signed certificates on our Nginx Web server and concludes the article, if you like article please do share your feedback and comments in below comment section.