Deepin is a user-friendly Debian based Linux distribution. It is a free and open source operating system mostly used at desktop level. Recently stable version of Deepin 20.1 has been released. Deepin 20.1 comes with stable kernel version 5.4 and Debian 10.6 package repositories.
In this article, we will cover Deepin 20.1 OS Installations steps with screenshots. Following are the minimum system requirements for Deepin 20.1
- More than 2 GB of RAM (4GB is recommended)
- Intel Pentium IV 2GHz (or higher)
- 25 GB free disk space ( or Higher)
- Bootable USB Drive
- Stable Internet Connection
Let’s jump into the Installation steps
Step 1) Download Deepin 20.1 ISO file
Download Deepin 20.1 ISO file on your system from their official web site, use the following URL:
Step 2) Create Bootable USB Drive for Deepin 20.1
Once ISO file is downloaded on your system then burn it into a USB drive and make it bootable. On windows system use ‘Rufus’ tool to create a bootable usb drive and on Linux systems use ‘UNetbootin’ tool or dd command.
Reboot the system on which you want to install Deepin 20.1 and go to the bios settings and change the boot medium from Hard disk to USB drive.
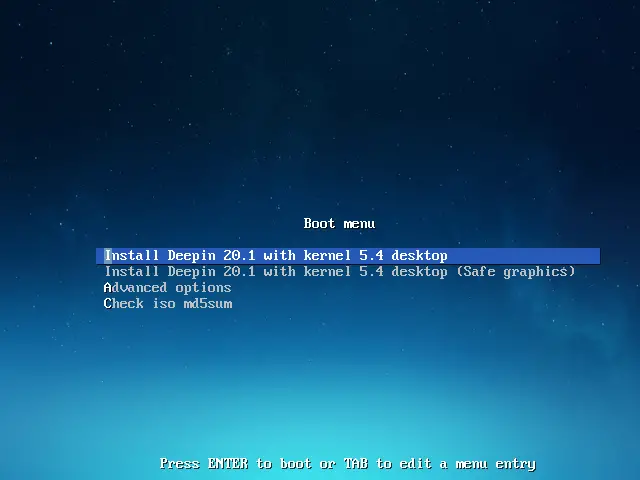
Step 3) Deepin 20.1 Installation Menu
Once the system boots up using the bootable USB drive then you will get the following screen, choose “Install Deepin 20.1 with kernel 5.4 desktop” and hit enter
Step 4) Choose your preferred language for installation
Select the language that suits to your installation and Accept Program License & End User License Agreement.
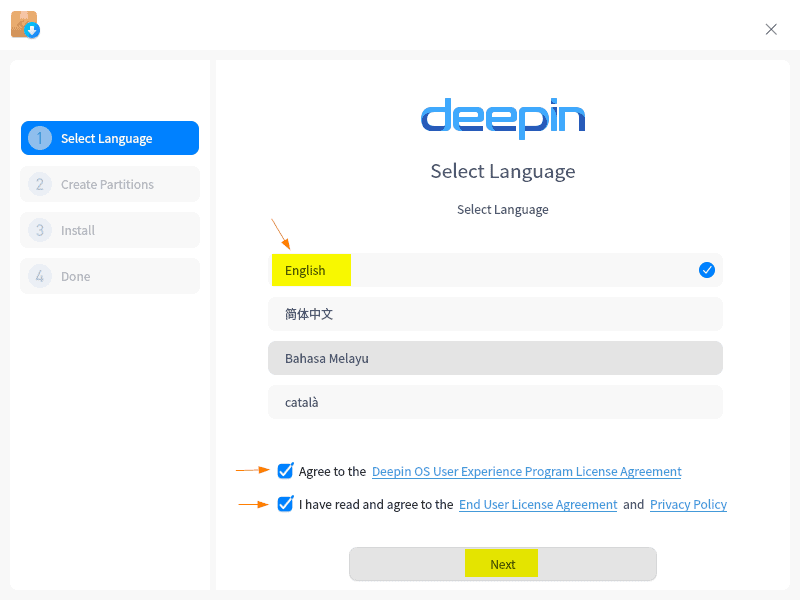
Click on ‘Next’
Step 5) Create Partitions for Deepin 20.1
In the next window , following screen will be presented. Here we have two options either installer to create required partitions automatically on disk or create partition manually.
As we can see I have 64 GB disk space and when I choose ‘Full Disk’ option and then click on Disk Icon then it will create partitions automatically and will show the partitions. If you wish to encrypt the disk as well then Click on ’Encrypt This Disk’ option.
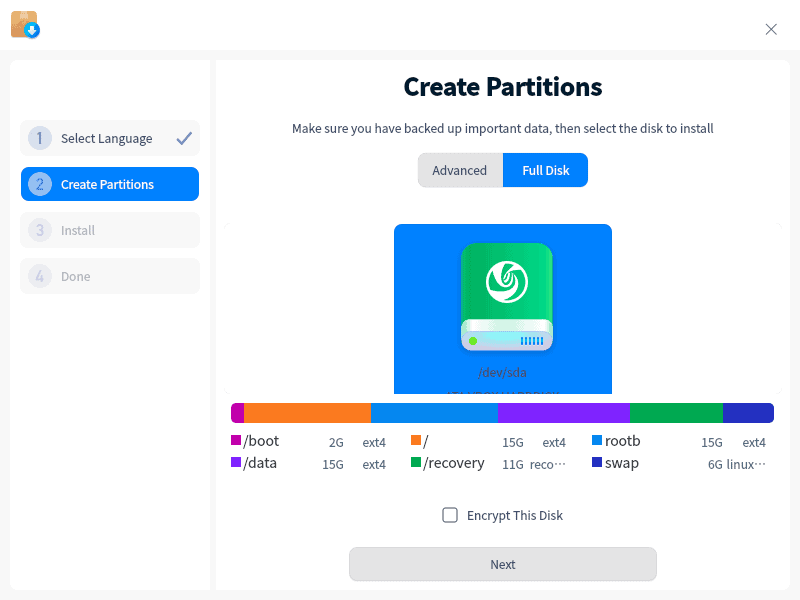
If you are planning to create own partitions scheme, then choose ‘Advanced’ option and select the disk and then click on ‘+’ sign to start creating partitions
Once you are done with partitions then Click on ‘Next’ to proceed further.
Note : In this guide, we are using automatic partition scheme created by installer.
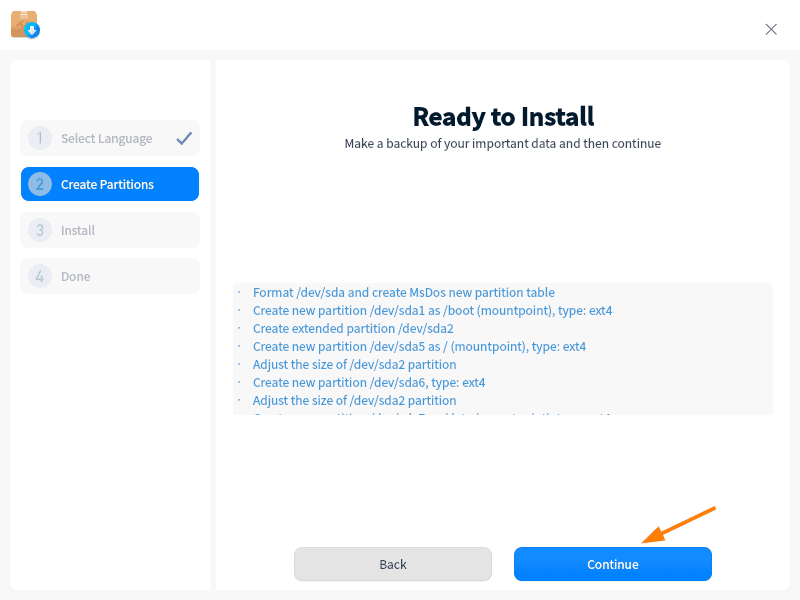
Click on ‘Continue’ to create and format partitions as ext4 file system.
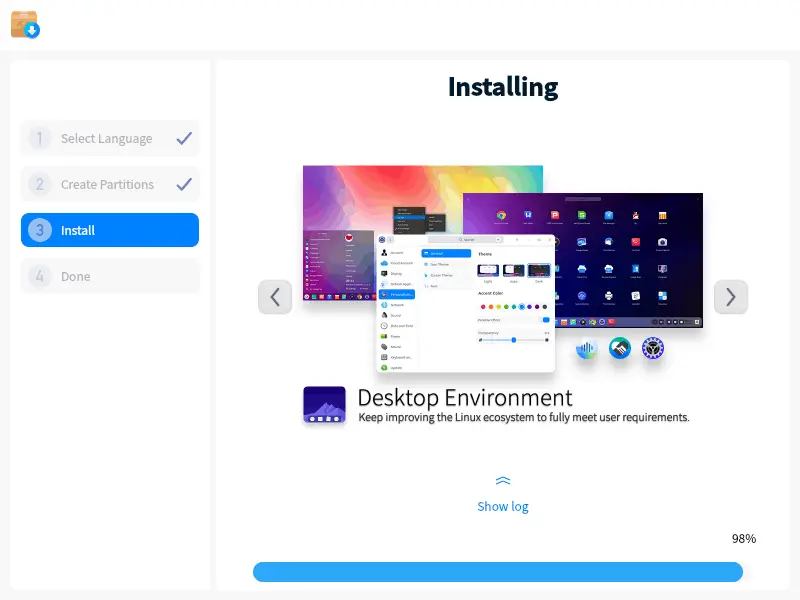
Step 6) Deepin 20.1 Installation Progress
Below Screen confirms that installation of Deepin 20.1 has been started and is in progress.
Once the Installation is completed, installer will prompt to reboot the system.

Click on ‘Reboot Now’
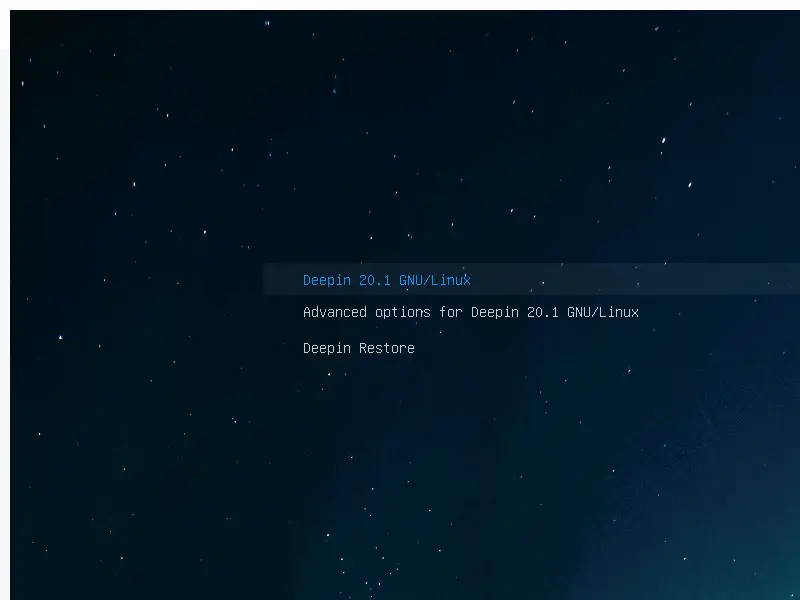
Step 7) Login Screen and Deepin Desktop after installation
After the reboot, following grub boot loader screen will be presented, choose the first option ‘Deepin 20.1 GNU/Linux’ and hit enter.
In the next window, choose the language for Deepin system and accept the license agreement.

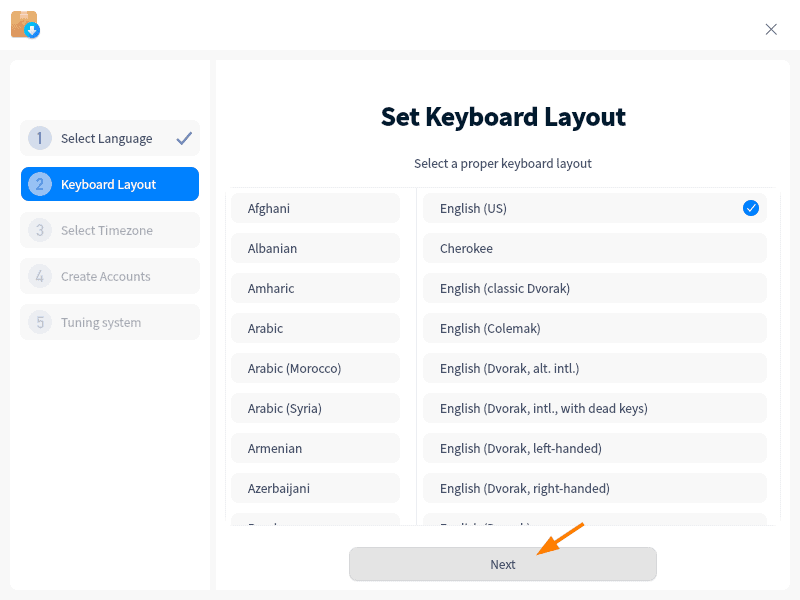
Click on Next and Choose the preferred keyboard layout in the following window,
Click on Next and Choose the Timezone for that suits to your system.
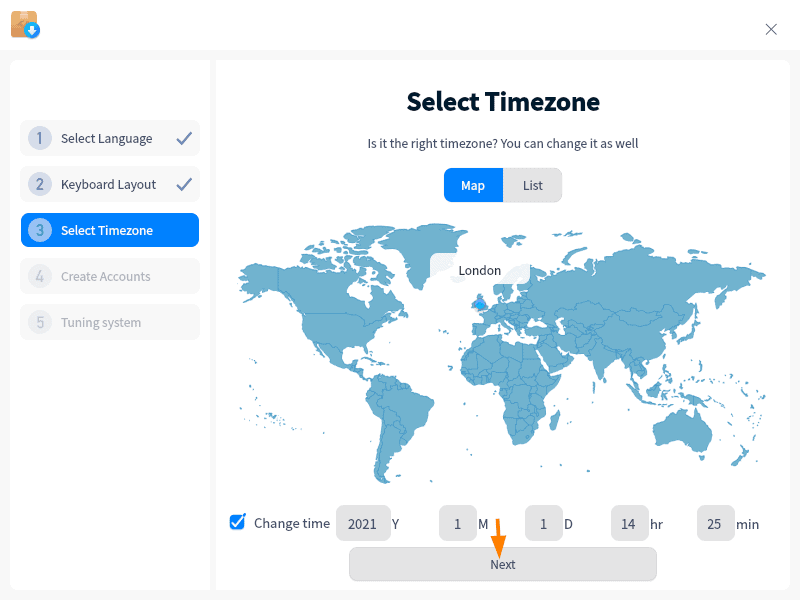
Click on Next
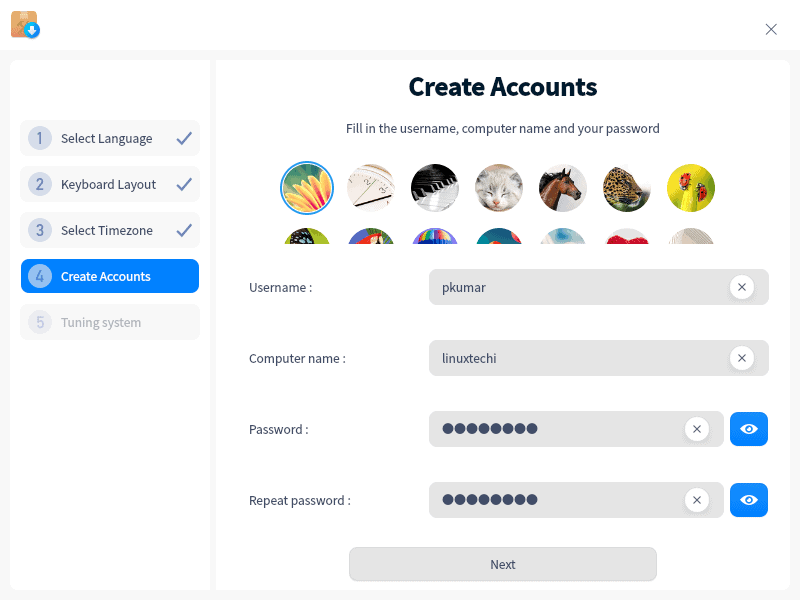
Specify the local username, its password and system’s hostname and then click on Next to proceed further.
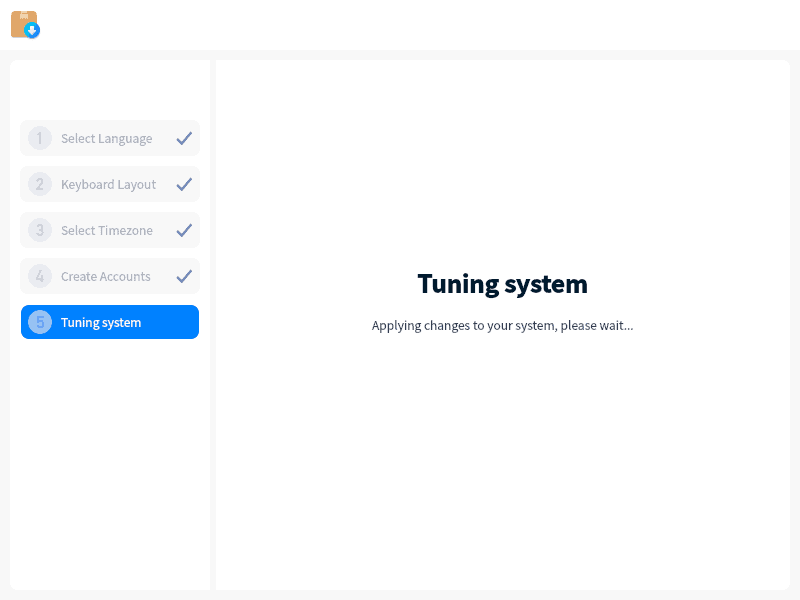
In the following window, above changes will be applied,
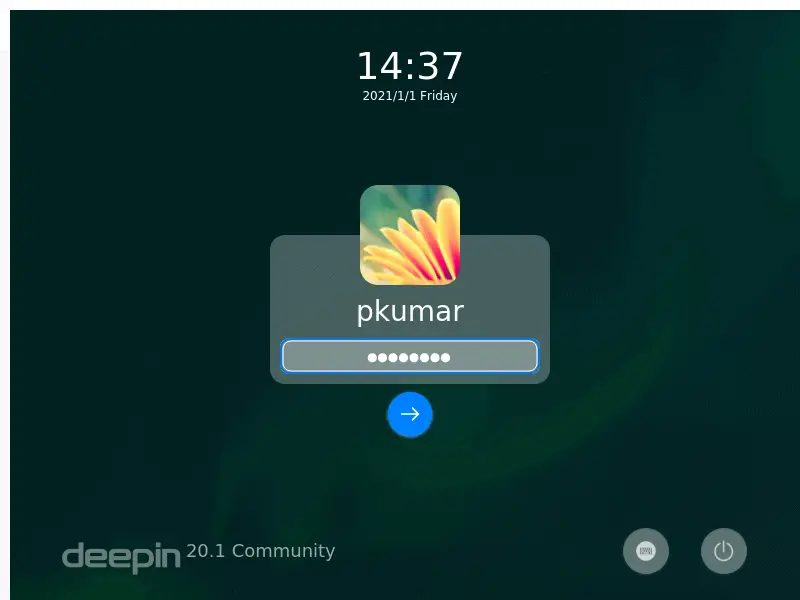
Now, finally we will get following login screen, use the same username and its credentials that was created above.
After entering the credentials, hit enter and following desktop screen will be presented.
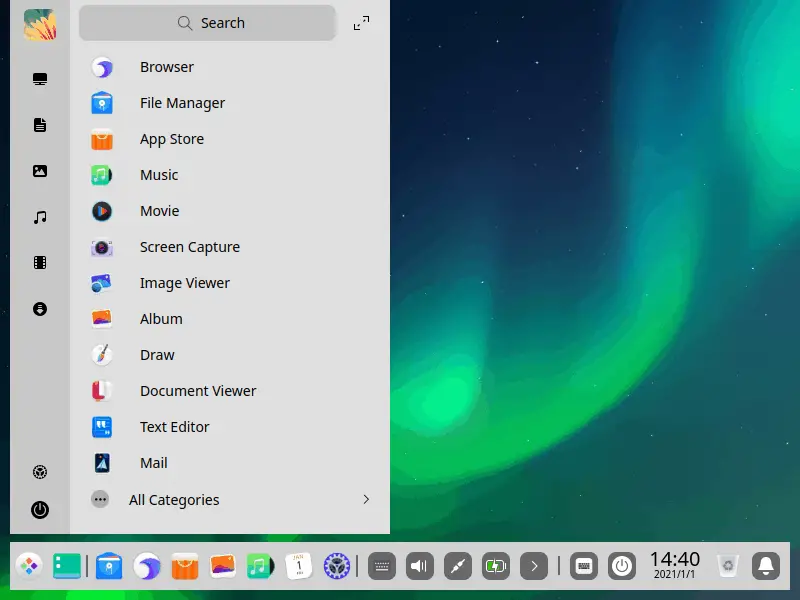
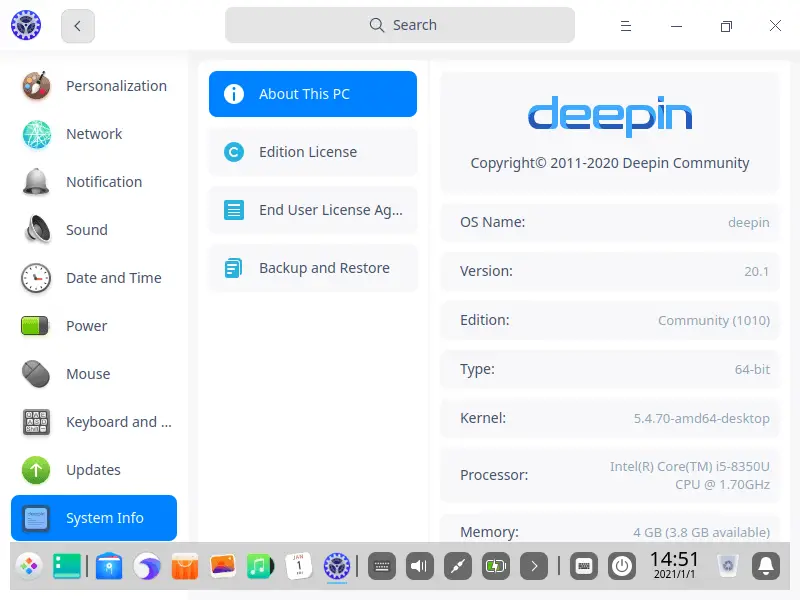
Above desktop screen confirms that Deepin 20.1 OS has been installed successfully. Now explore this exciting Linux distribution and have fun  .
.
Please don’t hesitate to share your feedback and comments on Deepin 20.1 OS installation steps.
The post Deepin 20.1 Installation Steps with Screenshots first appeared on LinuxTechi.